There is a wall at work on which someone has put up a bunch of cards, probably from past birthdays and occasions. So I was staring at it and there was this japanese card with a scratch-able area. Personally, I am a big fan of scratch cards so I thought, wouldn’t just be so awesome if I could make my own scratch card?

Lucky for me, after a bit of research, I found out they’re actually incredibly easy to make!

This is what you’ll need:
- A card. I made my own and left it blank so it can be customisable. It’s a bit silly, Mystical Cards lovers edition, good if you are planning on giving it to your other half. You can download it here.
- Normal tape and masking tape
- Acrylic paint and a brush
- Washing up liquid
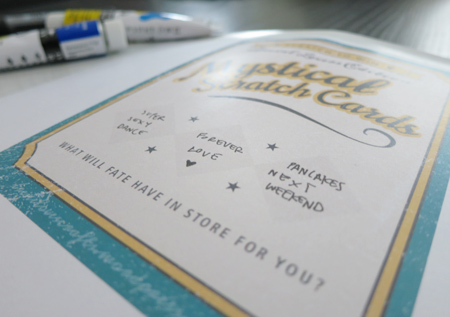
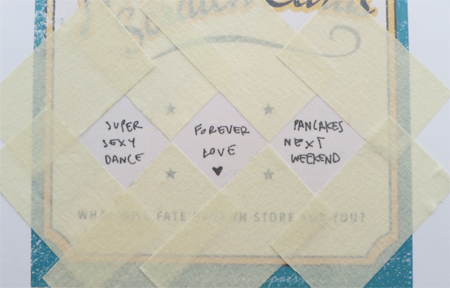
Make or print your card. Put normal tape on the area you want it to be scratch-able. If you are using my design, write down the message in the shaded squares and proceed to tape the squares with normal tape as that will be the scratch-able area.
Now take the masking tape and tape around the scratch-able area so no paint goes over the rest of your card. Make sure you press down on the tape so there are no gaps where the paint can sneak down under the tape. I didn’t do that enough so my squares were not so square afterwards.

Once you have achieved the colour you want by mixing the acrylics, mix two parts of acrylic paint with one part of washing up liquid. The washing up liquid is important as it’s what it will make it scratch-able. Paint what will be the scratch-able area.

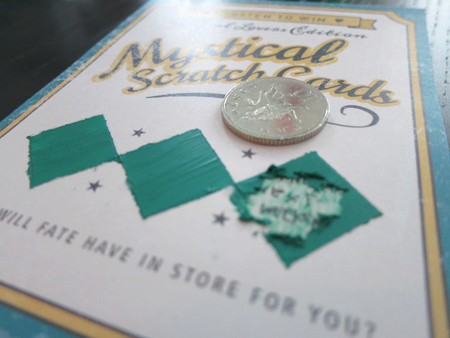
Let it dry and carefully remove the masking tape. It is ready to be scratched!
